STEPPING UP MY GAME ;) DIY with NO SEWING!!!
My newest project?... Well I came across this picture from a post on Pinterest.com under "DIY & Crafts"

 |
| So again, this is what I started out with... |

These are most the materials I used: about 5 yards worth of fabric (still have left overs) one of main color and one of mesh for curtains, 3 packs of stuffer (only used 2 of them so far, last one I'll use to make matching pillow), scissors, exact-o knife, binder clips and there are some other things in the picture that I guess I didn't need to use after all.
~~~~~~~~~~~~~~~~~~~~~~~~~~~~~~


First, I measured and covered the already existing mat with the main color fabric. Turn it over.
I proceeded by hot gluing one of the long sides first then using the binder clips to hold one of the short sides in place (not glued yet). Flipped it back over.
~~~~~~~~~~~~~~~~~~~~~~~~~~~~~~

Stuffed it with the 2 of 3 packages of stuffing, spreading it out a bit by hand, turned it back over and completed gluing all remaining sides (long before short), removing the binder clips.
~~~~~~~~~~~~~~~~~~~~~~~~~~~~~~

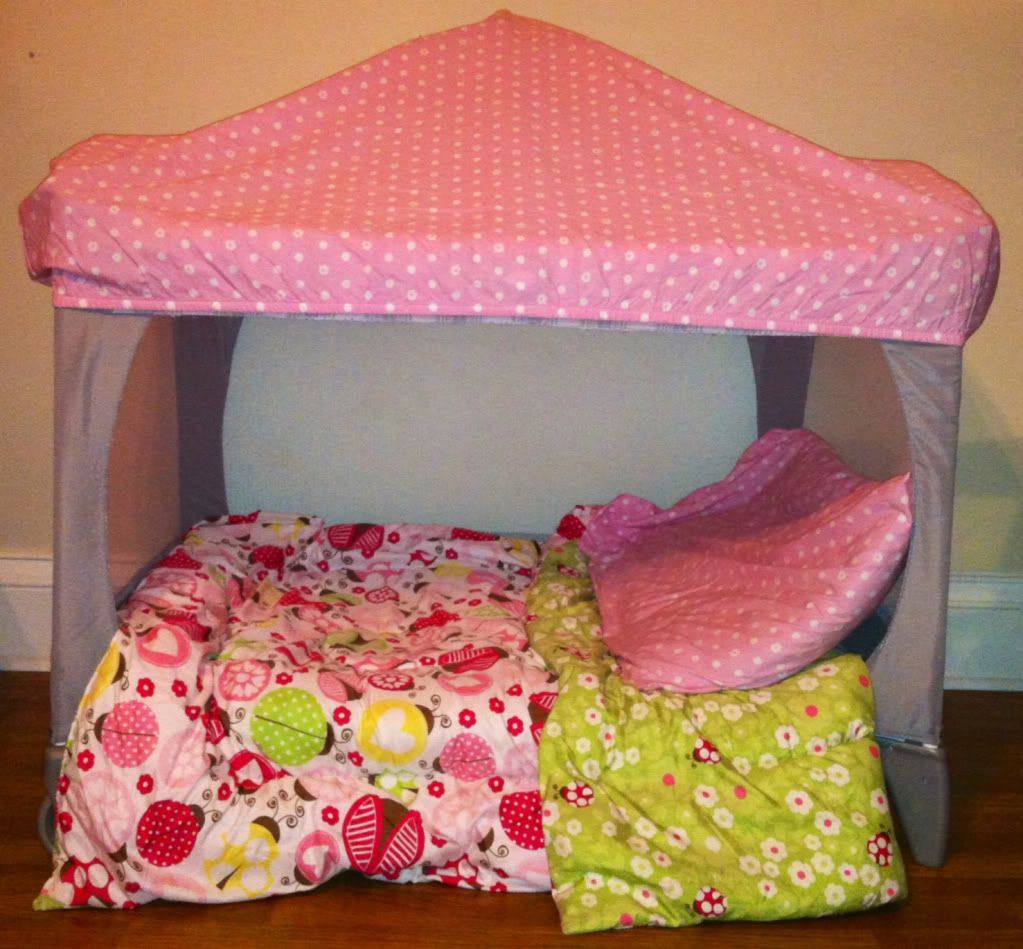
I made another gluing line about 2 inches apart from the first glue marks for some extra security, clipped the excess fabric, fluffed it out and tadaaa... the bed base is finished!
~~~~~~~~~~~~~~~~~~~~~~~~~~~~~~
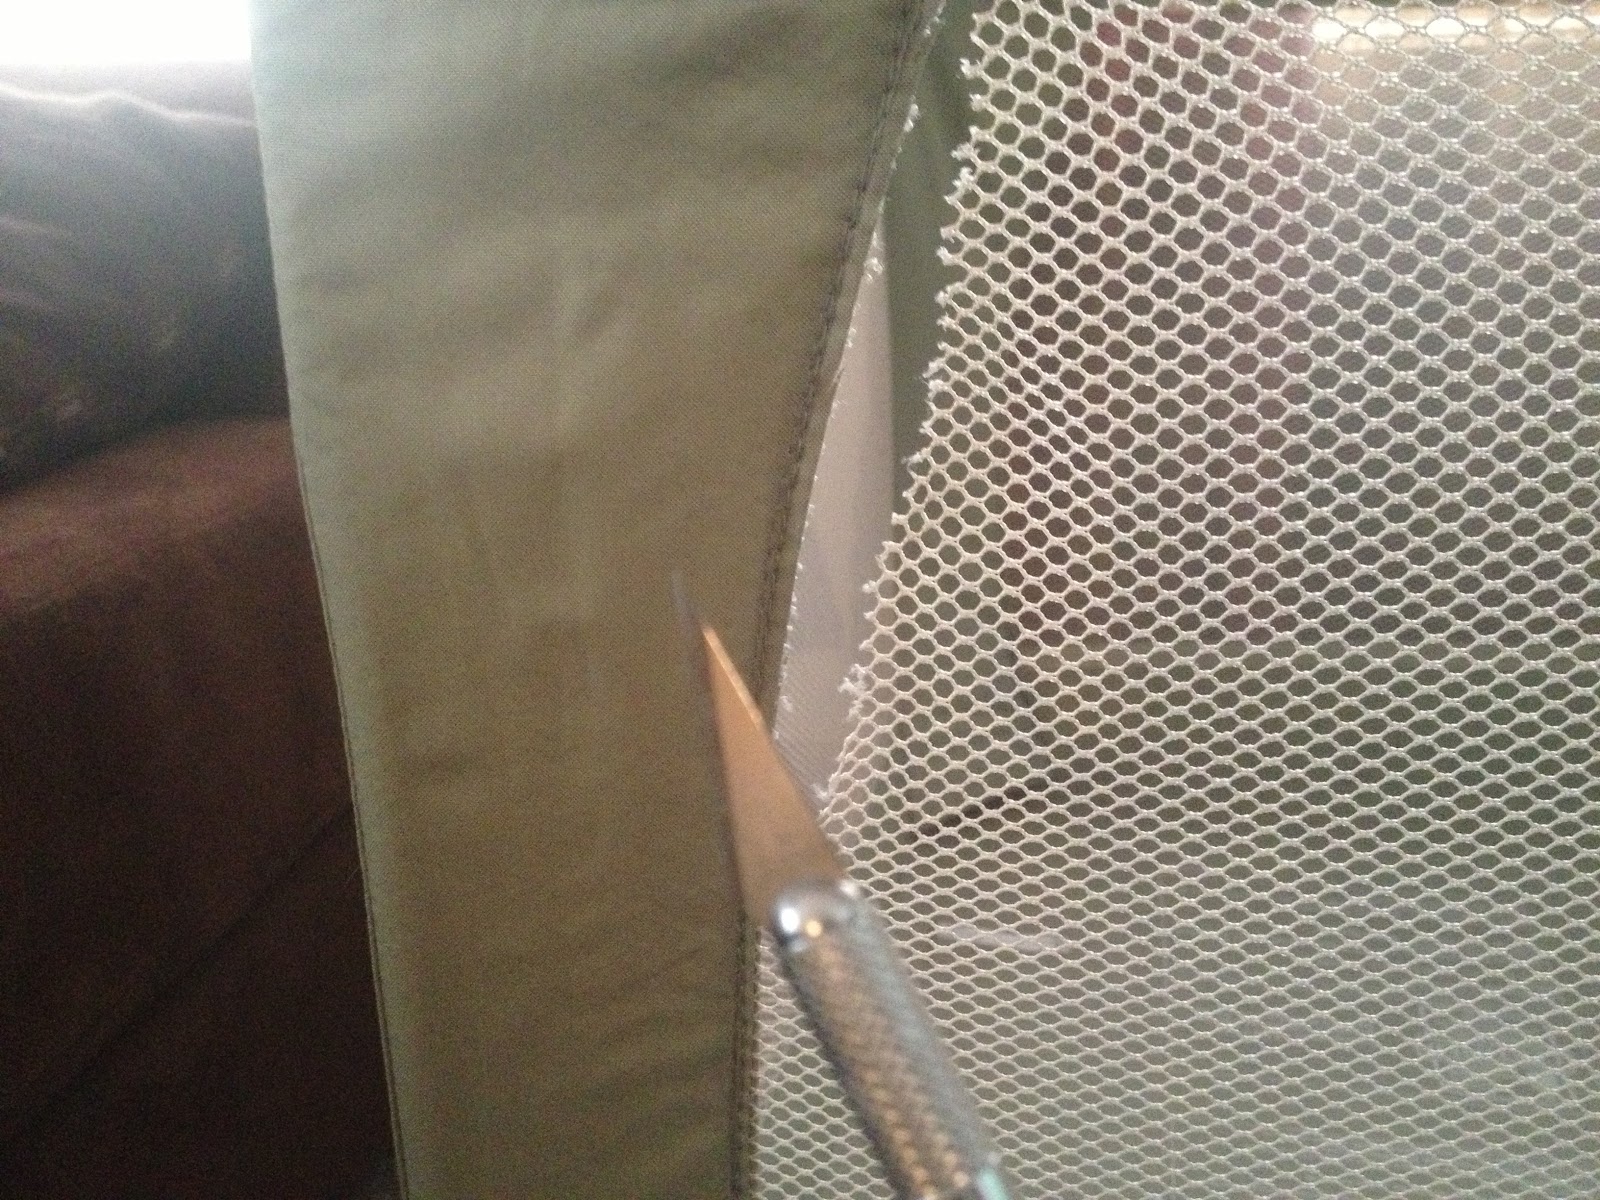
I only cut out the netting in the front using an exact-o knife, cutting as much of the netting away without cutting the existing seams (very important).
~~~~~~~~~~~~~~~~~~~~~~~~~~~~~~

Draped some fabric on the top (the middle is held by the mobile arm that came with the pack n play). You don't need to necessarily glue it down like I did but my young ones like to take things apart and bounce all over the walls, so I glued it down in hopes that I wouldn't have to be fixing it much. Holding good so far ;) I used rods that came with the pack n play (the ones that hold up the infant bassinet attachment) and draped the mesh material over it, cut it in half and tied it to the sides by making small holes on the sides with the remaining netting and used fabric from the excess material for ties (will beautify after)... and then CLEANED UP! :) that's the basics, can't wait to see what my hubby and I come up with for the completed look after all our decorating ideas are put together and put into action :)
If there are any questions on what I did or how I did it, please don't feel shame to leave a comment and ask... Thanks and I hope you and your little ones enjoy!
Did you finish this? id love to see the completed pic I love this I am in the process of a shopping list now for it lol..... do you know how much of the mesh material it took to make the curtains?
ReplyDeletei have not finished it yet :( my kids actually tore it up, so I will remake in a couple months when given time. I will post pics. I used only 1yd for the curtains, the longer, the more it stands out tho.
DeleteI'm just a little confused on what you did with the bassinet rods. Can you explain differently or post a close-up pic?
ReplyDeleteDid u cut side netting too or just the front
ReplyDeleteCan you explain the canopy part a little more?! I really want to do this!
ReplyDeleteYou can also use pool noodles for bumpers or the top
DeleteDid you ever get around to completing this project? I would love more information on the curtains. Thanks for the fun repurposing idea :)
ReplyDeleteCan you explain how you used the bassinet poles in more detail please?
ReplyDeletePerfect pet beds! :)
ReplyDeleteCheck hosiped for bed bumpers for adults
ReplyDeleteHello I just found this. Is would be nice if you could use a different Color for the distractions. It’s quite hard to see it. Thanks
ReplyDelete